If you haven’t checked out the new Screen Recording feature in Snagit for Google Chrome, I’d suggest you get on that! This is the easiest free screen recording option I’ve found. I’ve included detailed instructions below. Don’t let the length of this post be intimidating; I included an instruction for every step of the process. And, of course, you only need to do this setup once.
1. Go to the Chrome Web Store: https://chrome.google.com/webstore
2. “Search the store” for Snagit
3. Download both the Snagit App & Snagit Extension
4. Launch the Snagit App. Either use the “Apps” button in your bookmark bar or go to: chrome://apps/
5. The screen below should pop up. Hit the gear icon and then check the “enable experimental features” box, as in the image below:
6. Click “New Screen Recording”
7. The below window will pop up. This is a 1-time setup to enable screen capture. Click the link and follow the instructions, and then relaunch your browser.
8. Relaunch Chrome
9. Launch the Snagit App. Either use the “Apps” button in your bookmark bar or go to: chrome://apps/
10. Click “New Screen Recording”
11. Allow TechSmith Snagit to share your screen
12. You are now doing a screen capture! When you are done, hit the “stop sharing” button at the bottom of your screen.
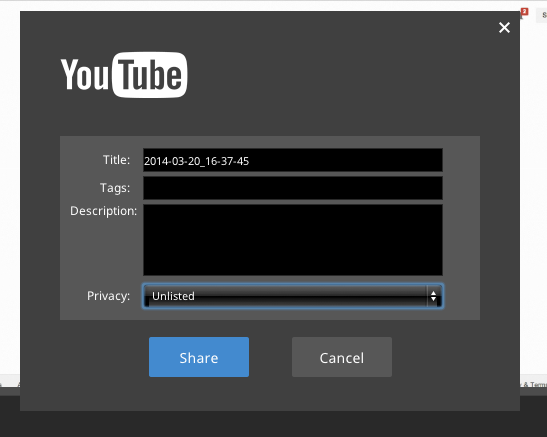
13. A window should pop up allowing you to share your video. Hit the “Share” button. Choose to share to YouTube.
Note: I am suggesting YouTube over Google Drive because using the Preview feature in Google Drive to view the video is not reliable right now. Hopefully that will change soon!
14. Title your video and choose either Unlisted or Public, depending on what privacy settings you’d like.
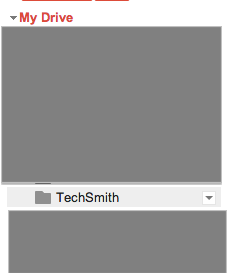
15. Your video will also be automatically saved to Google Drive: Go to Google Drive, and you’ll see that a TechSmith folder has been created. All screen recording and screen captures will automatically be sent there.
Note: if for any reason you have problems using the Share -> YouTube option, a great solution is the following:
1. Google Drive – > TechSmith Folder -> download your .avi file (by right clicking and choosing download0
2. YouTube -> Upload -> Choose your .avi file to upload
Happy Screen Recording!


Pingback: Screencasting – Some of My Favorite Things #flipclass #edtech | techieMusings
Pingback: Tablets for All! @Wacom + @TheAnswerPad for Daily Warmups @educreations / @awwapp for Student Screencasts #mathchat #flipclass | techieMusings
Pingback: My Top Blog Posts of 2014 | techieMusings